.webp)
Master the Breakout: A Comprehensive Tactical Guide to Surviving and Escaping in The Escapists 3

Team17's The Escapists 3 evolves the iconic prison-break sandbox formula into a fully dynamic 3D simulation. While the game retains its charming top-down heritage and satirical humor, it introduces expanded perimeter wild zones, advanced NPC behavioral trees, deeper crafting systems, and player skill progression. Breaking out of maximum-security facilities is no longer just about chipping through a single wall; it demands a systematic understanding of security routines, resource economies, structural vulnerabilities, and stealth mechanics.
Navigating these multi-layered penitentiaries presents a steep learning curve. A single missed roll call, an unhidden piece of contraband, or a misplaced shovel stroke can instantly trigger a lockdown, wiping out hours of meticulous preparation. Whether you are a solo mastermind or orchestrating a breakout with a four-player squad, mastering The Escapists 3 requires transitioning from reactionary survival to proactive strategic planning. This comprehensive guide provides step-by-step strategies to help you control guard routines, manipulate prison economies, craft high-tier gear, and execute seamless escapes across every facility.

1. How to Adapt to Daily Schedules, Avoid Detection, and Manage Suspicion
The foundation of every successful breakout in The Escapists 3 is absolute adherence to the prison routine. The daily schedule—encompassing Morning Roll Call, Breakfast, Work Hours, Exercise, Evening Roll Call, and Lights Out—governs the movement of every guard and inmate. The Security Meter measures how closely guards monitor your individual actions. Missing mandatory events or being spotted in unauthorized zones rapidly raises suspicion, eventually triggering targeted cell searches or immediate pursuit.
To minimize suspicion while planning your escape, you must master the art of "routine spoofing." During roll calls and meal times, check in briefly to satisfy the AI guard detection, then immediately utilize fake dummies or distraction tactics to buy yourself valuable exploration windows. Maintaining a clean personal record keeps guard Heat levels low, allowing you to move through medium-security areas without drawing unwanted attention.
Core Routine Management Rules
- Prompt Attendance: Always register your presence at Roll Call within the first 30 seconds of the block to prevent guard dispatches.
- Contraband Protocol: Never carry illegal items across active contraband detectors or during scheduled cell searches.
- Heat Reduction: Spend free-time periods resting, showering, or attending non-mandatory recreational events to passively lower guard Heat meters.
2. How to Build XP, Level Up Inmate Skills, and Customize Abilities
A major innovation in The Escapists 3 is the introduction of permanent Inmate Skill Progression. As you complete tasks, perform prison labor, and execute subtle contraband trades, you earn Inmate Experience Points (XP). This XP can be invested into core stat branches: Intellect, Strength, Agility, and Stealth, allowing you to tailor your inmate to match your preferred breakout strategy.
Raising your Intellect is mandatory for unlocking high-tier crafting blueprints, such as advanced wire cutters, sturdy shovels, and key molds. Strength increases your melee damage output and health pool, which is vital for prison riots or taking down isolated guards. Agility reduces stamina consumption during high-speed sprints and climbing, while Stealth quietens lockpicking noise and slows down guard detection meters when crouching in shadows.
Inmate Stat Allocation Strategy
- Intellect (Priority 1): Spend early hours reading in the library or studying computer terminals to reach Intellect Level 70+ quickly for essential tool recipes.
- Agility & Stealth (Priority 2): Train on treadmill stations or perform stealth maneuvers at night to improve movement speed and reduce acoustic detection range during night-time digs.
- Strength (Priority 3): Utilize weight benches during exercise blocks to ensure you can survive surprise encounters with security personnel.
3. How to Dominate the Inmate Economy, Jobs, and Favor Networks
Acquiring specialized tools, keys, and crafting bases requires a steady supply of prison currency (Gold) and inmate goodwill. Inmates operate a thriving underground economy. Obtaining official prison jobs—such as Janitor, Tailor, Metal Worker, or Kitchen Staff—provides a reliable daily salary while granting direct, legal access to high-value crafting components like duct tape, metal sheets, and chemicals.
In addition to formal labor, accepting "Favors" from fellow prisoners generates significant income and boosts personal reputation. Favors range from stealing specific items out of rival cells to creating distractions during roll call. High inmate favor ratings unlock discounted trade rates with inmate merchants and allow you to recruit accomplices to assist in fights or act as lookouts during illegal activities.
"A smart inmate never digs a tunnel with a spoon they stole themselves; they pay three other prisoners to source the tools while they hold the job that covers their tracks."
4. How to Scavenge, Loot, and Execute Advanced Item Crafting
Crafting in The Escapists 3 expands upon classic recipes, featuring over 120 lootable items, weapons, and structural tools. Every seemingly mundane object—from a bar of soap and a sock to a tub of glue and a battery—can be combined into a weapon or breakout utility. Mastering the crafting matrix is mandatory for overcoming reinforced security barriers like chain-link fences, solid brick walls, and heavy steel doors.
To craft high-tier gear safely, you must secure an upgraded Workbench or craft a Portable Utility Kit. Always pay close attention to tool durability meters. Using a tool until it breaks completely wastes valuable materials; instead, combine low-durability tools with fresh duct tape or metal scrap to restore their structural integrity before they snap mid-use.
Essential Early-to-Mid Game Recipes
Resulting ItemRequired IngredientsRequired IntellectPrimary UseLightweight CuttersFile x2, Duct Tape x140+Silent fence cutting during night patrolsSturdy ShovelSheet Metal x1, Wooden Handle x1, Duct Tape x160+High-speed floor tunneling and earth removalCell DummyBedsheet x2, Pillow x130+Fooled guards during nighttime roll call checksContraband PouchDuct Tape x1, Foil Lining x150+Conceals illegal items when walking past security detectors
5. How to Conceal Contraband and Construct Hidden Stash Zones
Carrying contraband on your person or leaving illegal tools out in your cell invites swift punishment. Scheduled cell raids happen randomly or when facility Heat rises. If guards find contraband in your desk or cell, all illegal items are confiscated, your structural progress (such as chipped walls or dug holes) is reset with concrete, and your character is thrown into Solitary Confinement.
Preventing item loss requires establishing hidden stashes outside of standard search grids. You can unscrew desk backboards, remove floor tiles beneath carpets, or hide items behind loose wall bricks. Advanced players create off-grid storage zones in maintenance corridors, utility shafts, or underground tunnel alcoves where guard patrols never tread.
Contraband Concealment Checklist
- Desk False-Bottoms: Install a False Desk Top to hide up to six illegal items during surprise cell inspections.
- Vent Hiding: Unscrew ventilation covers using a screwdriver, store heavy tools inside ducting, and reattach covers with fake plastic rivets.
- Soil Dumping: When tunneling, pack excavated dirt bags into unsearched maintenance zones or flush small amounts down toilets sequentially to avoid clutter.
6. How to Execute Underground Tunneling and Ventilation Navigation
When direct surface escapes are blocked by heavily armed guard towers, going underground or overhead provides a viable alternative. Tunneling requires a digging tool (such as a Spoon, Pickaxe, or Shovel), timber supports to prevent structural cave-ins, and a plan for disposing of excess dirt. Always cover tunnel entrances inside your cell with a poster, bed sheet, or fake floor tile before morning roll call.
Ventilation shafts offer a high-mobility highway above guard patrol routes. Using a Wire Cutter or Screwdriver, you can enter the HVAC system to bypass keycard doors, drop into sealed armories, or access the roof. Remember that crawling inside vents generates acoustic noise; ensure you level your Stealth stat or equip padded boots to avoid alerting guards walking on the floors below.

7. How to Counter Electric Fences, Security Cameras, and Guard Keycards
Modern prisons in The Escapists 3 feature advanced technological countermeasures, including high-voltage electric fences, motion-sensing CCTV cameras, and color-coded electronic locks. Striking an electric fence with standard cutters results in instant electrocution and alarms. Bypassing these systems requires high intellect and specialized electrical equipment.
Bypassing High-Tech Security Systems
- CCTV Blindspots: Spray paint camera lenses to disable vision cones temporarily, or locate the local power generator box and flip the main breaker switch.
- Electric Fences: Use Energy-Insulated Cutters or shut off generator power to cut through high-voltage perimeter fences safely.
- Keycard Cloning: Knock down an isolated guard carrying a key, copy the key using Putty to create a Key Mold, return the original key to the guard's inventory immediately to avoid a full-prison lockdown, and craft a Plastic Key replica at your workbench.
8. How to Navigate Perimeter Wild Zones Beyond the Prison Walls
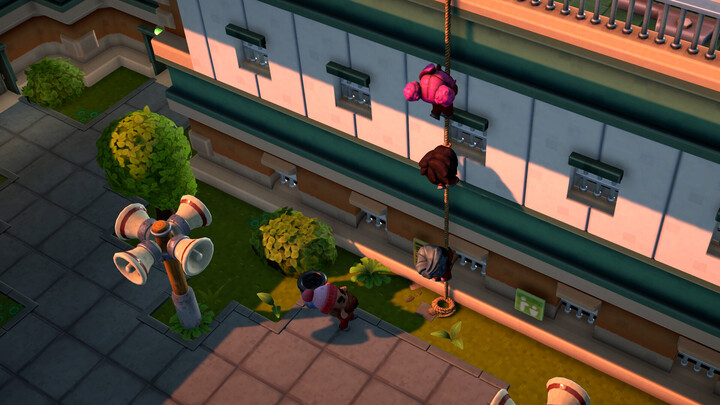
A unique mechanics expansion in The Escapists 3 is that breaching the primary wall or fence does not instantly guarantee freedom. Players must navigate treacherous Perimeter Wild Zones surrounding each facility—such as dense forests, rocky canyons, swampy riverways, or arid desert wastes. Once outside the walls, guard dogs, search helicopters, and terrain hazards present final challenges to your escape.
Navigating wild zones requires specialized survival gear. Crossing raging rivers requires crafting makeshift rafts or ziplines, while traversing dense wilderness areas demands compasses, flashlights, and camouflage wraps to break sightlines with tracking hounds. Planning your escape route must include both the prison breach and the wilderness traversal to reach your final getaway extraction point.
Wilderness Extraction Preparation
- Scout the Perimeter: Use binoculars from rooftop vantage points during exercise blocks to plot safe paths through outside terrain.
- Craft Environmental Gear: Assemble specialized wilderness survival tools (such as grappling hooks or waterproof bags) before making your final perimeter break.
- Manage Outdoor Stamina: Bring energy bars or cooked food items to maintain sprint stamina when fleeing search parties in open terrain.
9. How to Coordinate Multi-Inmate Escapes in Co-Op Multiplayer
The Escapists 3 fully supports local split-screen co-op for two players and online multiplayer for up to four inmates. Playing in a squad introduces powerful tactical opportunities that are impossible in solo mode. Tasks like digging, cutting, and hauling resources can be split among squad members, drastically reducing preparation time.
Cooperative escapes demand clear communication and role division. Assign one player as the "Lookout/Distraction Specialist" to hold guard attention at roll call or trigger fake fights, while the "Technician" hacks security boxes and the "Digger" excavates main tunnels. Synchronization is critical during final breakout pushes; if one squad member gets captured or trips an alarm, security locks down the entire perimeter for everyone.
10. How to Master Unique Breakout Routes Across Advanced Prisons
Every facility in The Escapists 3 features distinct environmental gimmicks, guard schedules, and architectural vulnerabilities. From low-security correctional centers to high-tech desert compounds and island fortresses, mastering the game requires adapting your strategy to match the structural realities of each location.
Prison Adaptation Checklist
- Level 1 (Minimum Security): Focus on basic fence-cutting or keycard cloning; guard paths are predictable and cell inspections are rare.
- Level 3 (Industrial Medium Security): Utilize job access in maintenance zones to exploit HVAC ducts, high-power generators, and ceiling roofs.
- Level 5 (Maximum Security / Island Fortresses): Combine deep underground tunneling with crafted sea-craft, environmental camouflage, and precise keycard replication to bypass motion sensors and automated turret towers.
Conclusion: Achieving Ultimate Freedom
Mastering The Escapists 3 is a test of patience, adaptability, resourcefulness, and tactical execution. The game transforms prison breakouts into satisfying systemic puzzles where every variable—from guard shift changes and inmate favors to tool durability and wall geometry—can be manipulated to your advantage. There is no single "correct" way to escape; success comes from studying the environment, recognizing structural flaws, and executing a well-prepared plan.
As you progress through increasingly complex facilities, embrace setbacks and failed escape attempts as learning opportunities. Every confiscated tool and solitary confinement sentence provides valuable intelligence about guard response times, security blind spots, and structural layout. Level up your inmate, assemble your tools, coordinate with your squad, and step out into the wild as a master of the ultimate breakout.
Master schedules, crafting, stats, and stealth to execute flawless prison breakouts alone or in co-op in the sandbox game The Escapists 3.